
Dead by Daylight is an asymmetrical multiplayer horror game where four Survivors attempt to escape from a Killer who hunts them down. The Survivors must work together to complete objectives and avoid being caught, while the Killer's goal is to eliminate all Survivors. This guide covers the game mechanics, strategies for Survivors and Killers, and tips for success.

Table of Contents

  1. Game Overview
  2. Core Gameplay Mechanics
    • Survivors
    • Killer
  3. Survivor Walkthrough
    • Objectives
    • Map Awareness
    • Survivor Perks and Builds
  4. Killer Walkthrough
    • Gameplay Objectives
    • Killer Strategies
    • Killer Powers and Perks
  5. Maps and Environment
  6. Tips for Success
  7. Progression System and Bloodweb

1. Game Overview

  • Developer/Publisher: Behaviour Interactive.
  • Game Type: 4v1 asymmetrical multiplayer.
  • Objective: Survivors repair generators to power exit gates and escape. The Killer hunts them and sacrifices them on hooks to the Entity.

2. Core Gameplay Mechanics

Survivors

  • Goal: Repair 5 generators, open an exit gate, and escape.
  • Abilities:
    • Repair generators.
    • Heal teammates or yourself (with a Medkit or perks).
    • Sabotage hooks (with a Toolbox or perks).
    • Use items like Flashlights, Medkits, and Toolboxes.
    • Vault windows and drop pallets to evade the Killer.

Killers

  • Goal: Down Survivors, hook them, and sacrifice them to the Entity.
  • Abilities:
    • Unique powers specific to each Killer.
    • Basic attack (lunge/slash).
    • Break pallets and walls to hinder Survivor movement.
    • Track Survivors using visual/auditory cues like scratch marks, noise notifications, and blood trails.


3. Survivor Walkthrough

Objectives

  1. Repair Generators:

    • Use your action button to repair generators. Avoid "skill check" failures to prevent alerting the Killer.
    • Tips:
      • Spread out across the map to work on different generators.
      • Use perks like Prove Thyself to boost repair speed with teammates.
  2. Escape the Killer:

    • Use stealth to avoid being found.
    • Vault windows and drop pallets to slow the Killer during chases.
  3. Unhook Teammates:

    • If a teammate is hooked, rescue them after the Killer leaves the area.
    • Avoid "camped" hooks unless you're confident you can distract the Killer.
  4. Open Exit Gates:

    • After repairing 5 generators, open one of the two gates using the switch.
    • Alternatively, find and use the Hatch if you're the last Survivor.

Map Awareness

  • Hiding: Use tall grass, lockers, and crouching to avoid detection.
  • Listening: Pay attention to the Killer's Terror Radius (heartbeat) and their unique sound cues.
  • Totems: Cleanse dull or hex totems to weaken Killer perks.
  • Chase Tactics:
    • Loop around pallets or windows to force the Killer into prolonged chases.
    • Learn the layout of each map for effective escape routes.

Survivor Perks and Builds

Survivors can equip up to four perks. Effective builds include:

  • Stealth Build:
    • Iron Will: Quiet injured sounds.
    • Urban Evasion: Faster crouching movement.
    • Spine Chill: Alerts you if the Killer is looking your way.
  • Healing Build:
    • Self-Care: Heal yourself without a Medkit.
    • Botany Knowledge: Faster healing.
  • Gen-Rush Build:
    • Prove Thyself: Faster generator repairs with teammates.
    • Resilience: Increased repair speed while injured.



4. Killer Walkthrough

Gameplay Objectives

  1. Hunt Survivors:

    • Use visual/auditory cues to locate Survivors.
    • Cues include scratch marks (from running), rustling grass, and loud noises (failed skill checks or rushed actions).
  2. Down Survivors:

    • Attack with basic or special abilities. Survivors are first injured, then downed (crawl state).
    • Once downed, pick them up and carry them to a hook.
  3. Hook Survivors:

    • Place Survivors on hooks to progress their sacrifice to the Entity.
    • Survivors can be hooked up to three times (depending on their struggle phase).

Killer Strategies

  1. Patrolling Generators:

    • Focus on high-traffic generators and use perks like Discordance to detect grouped repairs.
    • Kick partially repaired generators to regress their progress.
  2. Camping vs. Patrolling:

    • Camping hooks (staying nearby) can secure kills but reduces map control.
    • Patrolling keeps Survivors pressured and forces them to make risky plays.
  3. Chase Effectively:

    • Cut off Survivors’ loops by predicting their movements.
    • Use Killer-specific powers to end chases quickly.


Killer Powers and Perks

Each Killer has unique powers. Example strategies:

  • The Trapper:
    • Place bear traps in choke points or near generators/hooks.
  • The Huntress:
    • Use ranged hatchet throws to hit Survivors at a distance.
  • The Spirit:
    • Use her phasing ability to ambush Survivors unexpectedly.

Perks:

  • Barbecue & Chili: See Survivor auras after hooking someone.
  • Hex: Ruin: Automatically regress generator progress.
  • Pop Goes the Weasel: Kick generators for significant regression.

5. Maps and Environment

  • Map Layouts:
    • Randomized elements (pallets, windows, and totems) ensure each game feels unique.
    • Memorize key structures like Killer Shacks, vaults, and jungle gyms for both offense and defense.
  • Hex Totems:
    • Killers can use hex perks linked to totems. Survivors should cleanse these to weaken the Killer’s abilities.

6. Tips for Success

For Survivors:

  • Stick together early but split up for generator repairs.
  • Don’t rush rescues; ensure the area is safe before unhooking.
  • Use your items wisely and refill them with chests when needed.

For Killers:

  • Apply constant pressure by patrolling generators and hooking Survivors efficiently.
  • Learn each Killer’s strengths and weaknesses to maximize their powers.
  • Don’t tunnel (focus on a single Survivor); keep others busy to slow generator repairs.

7. Progression System and Bloodweb

Bloodweb:

  • Spend Bloodpoints to unlock perks, add-ons, and items for both Survivors and Killers.
  • Each level of the Bloodweb gets progressively larger and more expensive.

Prestige:

  • Once a character reaches level 50, you can prestige them to unlock exclusive cosmetics and higher-tier perks.

Currencies:

  • Bloodpoints: Earned through gameplay; used for upgrades.
  • Iridescent Shards: Used to unlock perks or characters.
  • Auric Cells: Premium currency for cosmetics and DLC content.

Dead by Daylight requires strategy, teamwork, and adaptability. Survivors must balance stealth and aggression to escape, while Killers must control the map and outsmart their opponents. By mastering mechanics and building strong perk combinations, you’ll increase your chances of survival—or domination.




June 21, 2016   Posted by SET INNOVATIVE
Read More


Step 1: Download and Install (a.k.a. The Obvious Part)


Download Call of Duty Mobile from the app store, and install it on your device. Don't worry, it won't bite... unless you're playing against a 12-year-old with a penchant for trash-talking.


Step 2: Choose Your Game Mode (a.k.a. The Fun Part)


Select from:


- Multiplayer (Team Deathmatch, Domination, etc.)

- Battle Royale (Last person/team standing)

- Zombies (Survive against undead minions)


Pick one, or play all – we won't judge.


Step 3: Customize Your Loadout (a.k.a. The "I'm a Pro" Part)


Choose your weapons, perks, and equipment. Don't worry if you don't know what you're doing – it's like throwing darts blindfolded (but less painful).


Step 4: Play the Game (a.k.a. The "Try Not to Die" Part)


Run, shoot, repeat. Or, you know, die. A lot. Like, seriously, it's okay – we've all been there.


Step 5: Use Your Controls (a.k.a. The "Don't Throw Your Phone" Part)


Master the art of:

- Moving (without walking into walls)
- Shooting (without firing into the ground)
- Scoping (without getting shot in the face)

Step 6: Communicate with Your Team (a.k.a. The "Please Don't Be Toxic" Part)

Use your mic to:

- Coordinate strategies
- Call out enemy positions
- Yell at teammates for being noobs (just kidding... or are we?)

Step 7: Level Up and Unlock Goodies (a.k.a. The "I'm a Baller" Part)

Earn experience points, level up, and unlock:

- New weapons
- Cool skins
- Taunts to annoy your enemies

Step 8: Don't Get Too Attached (a.k.a. The "Rage Quit" Part)

Remember, it's just a game. Don't throw your phone, don't yell at your screen, and don't blame the lag (even if it's really laggy).

And that's it! Now, go forth and not be a noob (or at least, try not to be). Happy gaming!
April 14, 2016   Posted by SET INNOVATIVE
Read More


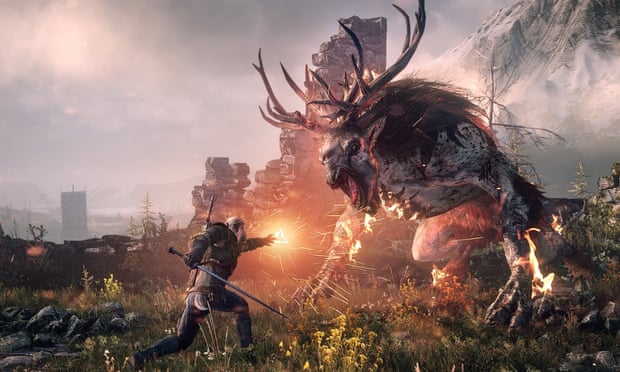
The Witcher 3: Wild Hunt is a critically acclaimed open-world RPG developed by CD Projekt Red. It follows Geralt of Rivia, a monster hunter (witcher), as he searches for his adoptive daughter, Ciri, while facing political intrigue and a looming supernatural threat known as the Wild Hunt. The walkthrough below covers the game's core systems, mechanics, and story progression.


Table of Contents

  1. Game Overview
  2. Core Mechanics
  3. Detailed Walkthrough
    • Prologue
    • Act 1: Velen, Novigrad, Skellige
    • Act 2: Battle Preparations
    • Act 3: Endgame
  4. Side Quests and Exploration
  5. Combat Tips and Strategies
  6. Crafting, Alchemy, and Upgrades
  7. Ending Variations


1. Game Overview

  • Main Story Length: ~50 hours.
  • Exploration/Side Content: 150+ hours.
  • Playable Areas: White Orchard, Velen, Novigrad, Skellige Isles, Kaer Morhen, and more.
  • Key Features:
    • Open-world exploration.
    • Choice-driven narrative with multiple endings.
    • Tactical combat with swords, signs (magic), bombs, and potions.

2. Core Mechanics

Combat

  • Two Swords:
    • Steel (humans/beasts) and Silver (monsters).
  • Signs:
    • Aard (telekinetic push), Igni (fire), Yrden (magical trap), Quen (protective shield), Axii (mind control).
  • Dodging/Rolling: Essential for avoiding attacks, especially against fast or large enemies.

Skills and Leveling

  • Earn experience points (XP) to level up. Allocate points to:
    • Combat: Focus on sword techniques.
    • Signs: Enhance magical abilities.
    • Alchemy: Improve potion/bomb effectiveness.
    • General: Passive skills like health boosts.

Alchemy

  • Brew potions, oils, and bombs using ingredients found in the world. Critical for tougher battles.
    • Potions: Boost health or stamina.
    • Oils: Apply to weapons for extra damage against specific enemy types.

Equipment and Upgrades

  • Gear has levels and rarity (common, rare, relic, Witcher gear).
  • Repair and upgrade at blacksmiths or armorers.

Choices and Consequences

  • Choices made in dialogue and quests affect story outcomes and relationships.


3. Detailed Walkthrough

Prologue: White Orchard

  • Main Quests:

    1. Kaer Morhen Tutorial: Learn basic combat, alchemy, and exploration mechanics.
    2. Lilac and Gooseberries: Begin your search for Yennefer.
      • Use Witcher senses to investigate clues.
    3. The Beast of White Orchard: Fight the Griffin (first major boss).
      • Prepare by crafting the Thunderbolt potion and applying Hybrid Oil to your silver sword.
  • Tips for White Orchard:

    • Explore thoroughly for loot and crafting materials.
    • Complete side quests to earn XP before tackling the Griffin.

Act 1: Velen, Novigrad, and Skellige

Velen (No Man's Land)

  • Key Quests:

    1. The Nilfgaardian Connection: Investigate Ciri's whereabouts.
    2. Bloody Baron: Help the Baron find his missing family.
      • Branching paths depending on your choices.
    3. Ladies of the Wood: Interact with the Crones of Crookback Bog.
      • Decisions here affect later outcomes.
  • Major Boss: The Botchling

    • Use Axii to calm it or fight directly. Quen and Specter Oil are critical.
  • Tips for Velen:

    • Explore hidden treasure locations marked by "?" on the map.
    • Avoid high-level enemies like Fiends and Leshens early on.


Novigrad

  • Key Quests:

    1. Pyres of Novigrad: Meet Triss Merigold.
    2. Count Reuven's Treasure: Solve a heist mystery and interact with key characters like Dijkstra.
    3. Get Junior: Hunt down the criminal Whoreson Junior.
  • Major Decision Point:

    • Choosing to aid Triss or focus on main storylines impacts future dialogue and relationships.
  • Tips for Novigrad:

    • Engage in Gwent matches to build your deck.
    • Take on side quests involving mage persecution for additional lore and rewards.

Skellige Isles

  • Key Quests:

    1. The King is Dead – Long Live the King: Attend King Bran’s funeral and navigate political intrigue.
    2. The Lord of Undvik: Search for clues about Ciri's time on the isles.
    3. The Tower Outta Nowheres: A magical side quest with a unique reward.
  • Major Boss: Imlerith (Wild Hunt General) at Bald Mountain.

    • Use heavy attacks, dodge frequently, and bring Elementa Oil.
  • Tips for Skellige:

    • Explore underwater treasure and hidden islands for relic gear.
    • Upgrade your boat to withstand Skellige’s rough seas.

Act 2: Battle Preparations

  • Key Locations: Kaer Morhen, Novigrad, Skellige.

  • Gather allies for the final battle with the Wild Hunt:

    • Yennefer, Triss, Crach an Craite, and others.
  • Defend Kaer Morhen in the Battle of Kaer Morhen.

  • Major Boss: Caranthir (Wild Hunt Mage)

    • Prepare with Frost resistance potions and Quen for his ice-based attacks.

Act 3: Endgame

  • Key Quests:

    1. Through Time and Space: Journey through dimensions with Avallac’h.
    2. Tedd Deireadh, The Final Age: Confront the Wild Hunt leader, Eredin.
  • Final Boss:

    • Eredin uses teleportation and frost-based attacks.
    • Dodge his heavy swings and counterattack during openings.


4. Side Quests and Exploration

  • Witcher Contracts: Monster-hunting quests providing coin and gear.
  • Treasure Hunts: Lead to Witcher gear sets (e.g., Griffin, Cat, Bear, and Wolf sets).
  • Romance Options: Develop relationships with Triss, Yennefer, or others through dialogue and choices.

5. Combat Tips and Strategies

  • Always keep swords repaired for maximum damage.
  • Use potions like Swallow (health regen) and Tawny Owl (stamina regen).
  • Exploit enemy weaknesses using specific oils and bombs.

6. Crafting, Alchemy, and Upgrades

  • Witcher Gear: Find blueprints for powerful weapons and armor.
  • Alchemy: Continuously upgrade potions and bombs using rare herbs.
  • Runestones and Glyphs: Enhance gear with additional effects.

7. Ending Variations

Your decisions throughout the game determine:

  1. Ciri’s Fate: She becomes Empress, a Witcher, or vanishes.
  2. Geralt’s Relationships: Ends up with Yennefer, Triss, or alone.
  3. The World’s State: Depending on political alliances and quest outcomes.


By following this walkthrough, you’ll navigate the richly detailed world of The Witcher 3 with efficiency and uncover its deepest secrets while crafting your own version of Geralt’s journey.
May 23, 2015   Posted by SET INNOVATIVE
Read More


Rust Walkthrough

1. Starting Out

When you first log into Rust, you’re going to feel exposed. You start with nothing except for a rock and a torch. The world around you is dangerous, with animals, hostile players, and environmental threats lurking at every turn. Your first few hours are all about survival and figuring out how to thrive in this tough environment.

Initial Tips for Starting:

  • Pick a good spawn location: When you spawn, you’ll have a choice of where to land. Choose an area away from large bases and busy areas where players are more likely to kill you. A peaceful area near resources like trees, rocks, and animals is ideal for early-game survival.

  • Gather Resources: Immediately start gathering materials. Use your rock to hit trees for wood and stones for resources. Collect wood, stone, and metal ore to start crafting basic tools. It’s crucial to gather as much as you can in the early game.

  • Craft a Stone Hatchet: After gathering enough wood and stone, craft a Stone Hatchet. This will allow you to gather wood and resources much faster. The more resources you gather, the better prepared you’ll be to craft useful tools and shelter.

2. Basic Survival and Crafting

Basic Crafting and Tools:

  • Stone Hatchet: Essential for chopping down trees faster.
  • Stone Pickaxe: Used for gathering metal ore, sulfur, and stone more efficiently.
  • Campfire: You need to craft a Campfire to cook food and stay warm during the night.
  • Building Materials: Once you have a good supply of resources, start crafting building materials like wooden foundations and walls to create a shelter.
  • Tools to Upgrade: Later on, you can craft tools like a Bow (for defense and hunting), Metal Tools, and Clothing (for warmth and protection).

Food and Health:

  • Hunting for Food: Look for wild animals (like deer, boars, and chickens) to hunt. You can craft a bow and arrows or a spear to kill them for meat. You can also find berries and mushrooms for food.
  • Cooking Food: Raw meat will lower your health, so be sure to cook it on your Campfire before eating. Use the Campsite to cook meat, which will give you more nutrition and help restore health.
  • Health Management: If your health gets too low, rest, or eat cooked food to regain health. Keep an eye on your hunger and thirst meters, as staying well-fed and hydrated is vital to survival.

3. Building Your First Base

One of the first things you’ll need to do is build a shelter to protect yourself from the environment and other players. Building a base is crucial for long-term survival.

Basic Base Building:

  • Foundations: Start by placing Foundations on the ground to create the floor of your base. A small 2x2 or 3x3 foundation is ideal for your first shelter.
  • Walls and Doors: After you’ve built your foundation, use Wooden Walls or Stone Walls to enclose your space. Don’t forget to craft a Door (or better, a Code Lock for security).
  • Sleeping Bag: Craft a Sleeping Bag and place it inside your base. This will serve as your spawn point in case you die, so it’s crucial to set one up early.
  • Storage: Craft Storage Boxes to store your resources and gear safely. Make sure to lock your storage with a Code Lock or Key to keep other players from accessing your stash.

Defending Your Base:

  • Tool Cupboard: Install a Tool Cupboard inside your base to control building permissions. This prevents other players from building near or around your base. You need to fill it with Wood to keep your building privilege active.
  • Traps and Defenses: You can set up wooden spikes, turrets, and landmines to protect your base from raiders. In the late game, you might build gates and external walls to make your base more difficult to raid.

4. Progressing and Crafting Advanced Items

As you gather more resources, you’ll start to unlock better equipment and upgrades. Rust is a game of progression, and the more you improve your gear and base, the more resilient you become.

Crafting Advanced Items:

  • Furnace: Craft a Furnace to smelt metal ore, sulfur, and stones into more advanced materials, like metal fragments and high-quality metal.
  • Weapons and Armor: Craft more advanced weapons like guns (P250, Shotgun, Assault Rifle) and armor (like metal armor or kevlar).
  • Research Table: The Research Table allows you to research blueprints for items you’ve found or crafted. This allows you to create better versions of tools, weapons, and building materials.

5. Dealing with Other Players

Other players in Rust are both your biggest threat and your potential allies. Since Rust is a multiplayer game, player interaction is central to the experience. There are several ways you can deal with other players:

  • PvP (Player vs. Player): You’ll encounter other players regularly. They can either kill you, steal your resources, or try to form alliances. You can choose to fight, defend, or negotiate. Having a weapon, armor, and a secure base is essential for PvP combat.
  • Raiding: As you progress, you’ll want to build your base in a way that makes it harder for others to raid. Players will raid your base for loot, and you can raid others’ bases for resources.
  • Alliances: Some players form alliances with others to share resources and defend each other. However, alliances can break down at any moment, and betrayal is common.

6. Advanced Strategies

Once you've established a base and gained access to high-level gear, you’ll need to refine your strategies for survival.

Building Up a Strong Economy:

  • Trading: Trading with other players can be an effective way to acquire rare resources without raiding. You can set up a shop or use trade posts to exchange goods.
  • Farming: You can start farming crops (like pumpkins and corn) to generate a steady food source.

Dealing with Raids:

  • Fortifying Your Base: Reinforce your base with stone and metal walls. Use roof turrets, claymore mines, and other defensive measures to prevent raiders from easily breaking in.
  • Counter-Raiding: If another group of players is raiding your base, gather your allies, set traps, and try to defend it. Counter-raiding can be lucrative if you manage to wipe out your attackers.

7. End-Game Goals

At the end of the game, you may want to:

  • Create a Dominant Base: Establish the most fortified base in the server.
  • Control Monuments: Dominate key monuments (like airfields, military tunnels, and rad towns) where loot is plentiful.
  • Enjoy the PvP: Continue raiding, defending, and engaging in massive PvP battles with other players.

Final Tips:

  • Stay on the Move: Don’t stay in one place too long. Move around to gather resources, expand your base, and avoid being targeted.
  • Know When to Fight and When to Flee: Don’t fight if you’re unprepared. Sometimes it’s smarter to retreat, regroup, and strike back later.


December 13, 2013   Posted by SET INNOVATIVE
Read More


Warframe is a free-to-play, cooperative third-person action game developed by Digital Extremes. It combines fast-paced combat, expansive environments, and deep RPG mechanics. Players control a member of the Tenno, an ancient race of warriors who pilot powerful exosuits called Warframes. The game blends PvE (player vs. environment), PvP (player vs. player), and open-world gameplay. Below is a detailed and technical walkthrough to help new and experienced players progress efficiently.


1. Starting the Game

Character Selection:
At the beginning, you choose one of three starter Warframes:

  1. Excalibur: Balanced and melee-focused.
  2. Mag: Specializes in manipulating enemies using magnetic fields.
  3. Volt: Offers speed boosts and lightning-based attacks.

Tip: Excalibur is the best for beginners due to its versatility.


2. Core Mechanics

Movement System

Warframe’s movement is fluid and acrobatic, referred to as "Parkour 2.0." Key techniques include:

  • Bullet Jump: Combine crouch + jump for a fast and far-reaching jump.
  • Wall Running/Climbing: Jump against walls to traverse vertical spaces.
  • Aim Glide: While mid-air, hold the aim button to slow your fall and target enemies.
  • Roll and Sprint: Boost movement by rolling or sprinting to cover ground quickly.

Tip: Master movement early as it’s vital for combat and speedrunning missions.


Combat Mechanics

Combat combines melee weapons, firearms, and abilities. Core aspects include:

  • Primary Weapons: Rifles, bows, and shotguns (e.g., Soma Prime, Paris).
  • Secondary Weapons: Pistols and thrown weapons (e.g., Akstiletto, Kunai).
  • Melee Weapons: Swords, glaives, polearms (e.g., Skana, Galatine).
  • Abilities: Each Warframe has four unique abilities, fueled by energy (blue orb pickups).

Tip: Use combos of weapons and abilities for crowd control. Modding (explained below) enhances their damage and utility.


Mission Types

There are various mission types, each with unique objectives:

  1. Exterminate: Kill all enemies.
  2. Capture: Hunt a target, incapacitate them, and secure their capture.
  3. Rescue: Save hostages.
  4. Survival: Stay alive for a set duration while collecting life-support capsules.
  5. Defense: Protect an objective from waves of enemies.
  6. Spy: Steal data from enemy terminals without being detected.
  7. Open-World: Vast maps with bounties and exploratory tasks.

Tip: Focus on Spy and Defense missions early for valuable resource rewards.


3. Progression

Mastery Rank

Mastery Rank (MR) is your overall account progression level. Gaining MR unlocks:

  • New weapons and Warframes.
  • Higher daily standing caps with factions.
  • Access to advanced content like Arbitrations and the Steel Path.

How to Increase MR:

  • Use and level up new weapons, Warframes, companions, and vehicles.
  • Complete missions on the Star Chart.

Tip: Always craft and level up new gear to maximize MR gains.


The Star Chart

The Star Chart is the game’s progression map, with missions spread across planets. Unlock planets by completing Junctions, which act as milestones with specific tasks.

  • Key Planets:
    • Earth: Entry-level missions.
    • Venus: Introduces open-world gameplay (Orb Vallis).
    • Mars: Access to the first Archwing mission.
    • The Void: Contains relic missions for prime gear.

Tip: Follow the Star Chart to unlock quests and essential gameplay systems like Railjack and Archwing.


Quests

Quests drive the narrative and unlock new features. Key quests include:

  1. Vor’s Prize (Starter): Introduces gameplay mechanics.
  2. The Second Dream: A pivotal quest revealing the Tenno’s true nature.
  3. The War Within: Unlocks the Operator, a vital gameplay feature.
  4. Chains of Harrow: Introduces Harrow and psychological horror elements.
  5. The New War: Expands the main storyline, adding emotional depth.

Tip: Focus on story quests as they unlock advanced systems like Focus Schools and Amp crafting.


4. Gear and Crafting

Weapons

Weapons come in three tiers: standard, syndicate, and prime (endgame). Start with standard weapons, then upgrade to syndicate and prime variants by:

  • Farming resources.
  • Acquiring blueprints from factions or relics.

Tip: Always equip new weapons to gain mastery points, even if they aren’t optimal.


Warframes

Warframes define your playstyle. Key steps to acquire them:

  1. Complete boss fights to farm Warframe parts (e.g., Rhino from Venus’ Jackal).
  2. Craft parts in the Foundry.
  3. Build the Warframe after obtaining all parts.

Tip: Focus on Warframes with supportive or versatile abilities like Rhino or Trinity early on.


Mods

Mods are equippable upgrades that enhance weapons, Warframes, and companions. Key types include:

  • Damage Mods: Serration (rifles), Hornet Strike (pistols).
  • Utility Mods: Streamline (ability efficiency), Flow (ability energy capacity).
  • Aura Mods: Boost entire squad stats (e.g., Energy Siphon).

Tip: Always upgrade essential mods (e.g., Vitality, Steel Fiber) to improve survivability.


5. Advanced Features

Relics and Prime Farming

Relics are used to acquire Prime gear. Farm relics in Void missions, then refine them to increase the chance of rare drops.

Tip: Run public relic missions to combine your team’s relics for better drop odds.


Focus System

Unlocked in The Second Dream, this allows players to enhance their Operators and abilities. Focus Schools offer various playstyles:

  1. Naramon: Melee crits and combo efficiency.
  2. Zenurik: Energy regeneration (recommended for new players).
  3. Madurai: Boosts damage output.

Tip: Prioritize Zenurik for consistent energy gain during missions.


Archwing

The Archwing is a flight module allowing players to engage in space combat. Key modes include:

  • Archwing Missions: Space-only battles.
  • Open-World Mobility: Use Archwing to traverse landscapes like Plains of Eidolon.

Warframe: Comprehensive and Technical Walkthrough

Warframe is a free-to-play, cooperative third-person action game developed by Digital Extremes. It combines fast-paced combat, expansive environments, and deep RPG mechanics. Players control a member of the Tenno, an ancient race of warriors who pilot powerful exosuits called Warframes. The game blends PvE (player vs. environment), PvP (player vs. player), and open-world gameplay. Below is a detailed and technical walkthrough to help new and experienced players progress efficiently.


1. Starting the Game

Character Selection:
At the beginning, you choose one of three starter Warframes:

  1. Excalibur: Balanced and melee-focused.
  2. Mag: Specializes in manipulating enemies using magnetic fields.
  3. Volt: Offers speed boosts and lightning-based attacks.

Tip: Excalibur is the best for beginners due to its versatility.


2. Core Mechanics

Movement System

Warframe’s movement is fluid and acrobatic, referred to as "Parkour 2.0." Key techniques include:

  • Bullet Jump: Combine crouch + jump for a fast and far-reaching jump.
  • Wall Running/Climbing: Jump against walls to traverse vertical spaces.
  • Aim Glide: While mid-air, hold the aim button to slow your fall and target enemies.
  • Roll and Sprint: Boost movement by rolling or sprinting to cover ground quickly.

Tip: Master movement early as it’s vital for combat and speedrunning missions.


Combat Mechanics

Combat combines melee weapons, firearms, and abilities. Core aspects include:

  • Primary Weapons: Rifles, bows, and shotguns (e.g., Soma Prime, Paris).
  • Secondary Weapons: Pistols and thrown weapons (e.g., Akstiletto, Kunai).
  • Melee Weapons: Swords, glaives, polearms (e.g., Skana, Galatine).
  • Abilities: Each Warframe has four unique abilities, fueled by energy (blue orb pickups).

Tip: Use combos of weapons and abilities for crowd control. Modding (explained below) enhances their damage and utility.


Mission Types

There are various mission types, each with unique objectives:

  1. Exterminate: Kill all enemies.
  2. Capture: Hunt a target, incapacitate them, and secure their capture.
  3. Rescue: Save hostages.
  4. Survival: Stay alive for a set duration while collecting life-support capsules.
  5. Defense: Protect an objective from waves of enemies.
  6. Spy: Steal data from enemy terminals without being detected.
  7. Open-World: Vast maps with bounties and exploratory tasks.

Tip: Focus on Spy and Defense missions early for valuable resource rewards.


3. Progression

Mastery Rank

Mastery Rank (MR) is your overall account progression level. Gaining MR unlocks:

  • New weapons and Warframes.
  • Higher daily standing caps with factions.
  • Access to advanced content like Arbitrations and the Steel Path.

How to Increase MR:

  • Use and level up new weapons, Warframes, companions, and vehicles.
  • Complete missions on the Star Chart.

Tip: Always craft and level up new gear to maximize MR gains.


The Star Chart

The Star Chart is the game’s progression map, with missions spread across planets. Unlock planets by completing Junctions, which act as milestones with specific tasks.

  • Key Planets:
    • Earth: Entry-level missions.
    • Venus: Introduces open-world gameplay (Orb Vallis).
    • Mars: Access to the first Archwing mission.
    • The Void: Contains relic missions for prime gear.

Tip: Follow the Star Chart to unlock quests and essential gameplay systems like Railjack and Archwing.


Quests

Quests drive the narrative and unlock new features. Key quests include:

  1. Vor’s Prize (Starter): Introduces gameplay mechanics.
  2. The Second Dream: A pivotal quest revealing the Tenno’s true nature.
  3. The War Within: Unlocks the Operator, a vital gameplay feature.
  4. Chains of Harrow: Introduces Harrow and psychological horror elements.
  5. The New War: Expands the main storyline, adding emotional depth.

Tip: Focus on story quests as they unlock advanced systems like Focus Schools and Amp crafting.


4. Gear and Crafting

Weapons

Weapons come in three tiers: standard, syndicate, and prime (endgame). Start with standard weapons, then upgrade to syndicate and prime variants by:

  • Farming resources.
  • Acquiring blueprints from factions or relics.

Tip: Always equip new weapons to gain mastery points, even if they aren’t optimal.


Warframes

Warframes define your playstyle. Key steps to acquire them:

  1. Complete boss fights to farm Warframe parts (e.g., Rhino from Venus’ Jackal).
  2. Craft parts in the Foundry.
  3. Build the Warframe after obtaining all parts.

Tip: Focus on Warframes with supportive or versatile abilities like Rhino or Trinity early on.


Mods

Mods are equippable upgrades that enhance weapons, Warframes, and companions. Key types include:

  • Damage Mods: Serration (rifles), Hornet Strike (pistols).
  • Utility Mods: Streamline (ability efficiency), Flow (ability energy capacity).
  • Aura Mods: Boost entire squad stats (e.g., Energy Siphon).

Tip: Always upgrade essential mods (e.g., Vitality, Steel Fiber) to improve survivability.


5. Advanced Features

Relics and Prime Farming

Relics are used to acquire Prime gear. Farm relics in Void missions, then refine them to increase the chance of rare drops.

Tip: Run public relic missions to combine your team’s relics for better drop odds.


Focus System

Unlocked in The Second Dream, this allows players to enhance their Operators and abilities. Focus Schools offer various playstyles:

  1. Naramon: Melee crits and combo efficiency.
  2. Zenurik: Energy regeneration (recommended for new players).
  3. Madurai: Boosts damage output.

Tip: Prioritize Zenurik for consistent energy gain during missions.


Archwing

The Archwing is a flight module allowing players to engage in space combat. Key modes include:

  • Archwing Missions: Space-only battles.
  • Open-World Mobility: Use Archwing to traverse landscapes like Plains of Eidolon.

Railjack

Railjack introduces space exploration and large-scale ship battles. Upgrade your ship by farming resources and recruiting a crew.

Tip: Railjack is essential for endgame content like Void Storms and Sentient Anomalies.


6. Endgame Content

  1. Sorties: High-level daily missions with unique modifiers and rewards.
  2. Arbitrations: Elite missions with


March 29, 2013   Posted by SET INNOVATIVE
Read More


             Minecraft: Complete Walkthrough

1. Introduction to the Game

Minecraft is a sandbox game that allows players to explore, build, and survive in a blocky, procedurally generated world. The game features two primary modes: Survival and Creative, each offering different gameplay experiences.

2. Getting Started

  1. Installation

    • PC: Download Minecraft from the official website or a digital distribution platform like the Microsoft Store or Steam. Follow the installation instructions.
    • Console: Available on PlayStation, Xbox, and Nintendo Switch. Purchase and install from the respective store.
  2. Creating an Account

    • Mojang/Microsoft Account: Sign up or log in to your Mojang or Microsoft account to save your progress and access additional features.
  3. Initial Setup

    • Settings: Adjust graphics, sound, and control settings according to your preference. Customize controls and sensitivity to your liking.

3. Understanding the Game Mechanics

  1. Basic Controls

    • Movement: Use the joystick or WASD keys to move your character. Use the space bar to jump and crouch with the shift key.
    • Interaction: Left-click to mine or attack, and right-click to place blocks or interact with objects.
  2. Inventory and Crafting

    • Inventory Management: Press ‘E’ to open your inventory. Here, you can see and manage the items you’ve collected.
    • Crafting: Use the crafting grid to create items from raw materials. Craft basic tools, weapons, and blocks using different combinations of materials.
  3. Building and Mining

    • Building: Place blocks to construct structures. Use different types of blocks and materials to create various designs.
    • Mining: Dig into the ground to collect ores and materials. Use different tools to mine resources more efficiently.

4. Playing the Game

  1. Survival Mode

    • Starting Out: Collect basic resources like wood and stone. Craft tools and a shelter to protect yourself from hostile mobs.
    • Resource Gathering: Mine ores, gather food, and explore the world to find valuable resources. Build farms and animal pens for a steady food supply.
    • Combat and Defense: Defend yourself from hostile mobs like zombies and skeletons. Craft weapons and armor to improve your combat effectiveness.
  2. Creative Mode

    • Exploration and Building: Use unlimited resources to build and design without restrictions. Explore the world and experiment with different building techniques.
    • Customization: Use creative tools to modify terrain, place blocks, and create large-scale projects. Access the inventory to get any item or block instantly.
  3. Adventure Mode

    • Exploration: Explore custom maps and adventure scenarios created by other players. Follow specific rules and objectives set within the adventure.

5. Advanced Strategies

  1. Survival Tips

    • Farming and Agriculture: Create efficient farms for crops and animals. Use irrigation and breeding techniques to maximize your yield.
    • Exploring Biomes: Discover different biomes to find unique resources and structures. Each biome has its own set of resources and environmental challenges.
    • Enchanting and Potions: Use enchantments and potions to enhance your gear and gain various buffs. Find or create enchanting tables and potion brewing stations.
  2. Building and Design

    • Redstone Creations: Learn to use redstone to create complex contraptions like traps, automated farms, and machinery.
    • Architectural Design: Experiment with different architectural styles and building techniques. Use various materials and blocks to create detailed and unique structures.
  3. Multiplayer and Community

    • Joining Servers: Connect to multiplayer servers to play with others. Participate in community events, mini-games, and collaborative builds.
    • Hosting Your Own Server: Set up your own Minecraft server to host games with friends. Configure server settings and install mods for a customized experience.

6. Troubleshooting and Support

  1. Common Issues

    • Performance Problems: Address lag or crashes by adjusting graphics settings, updating drivers, and optimizing your system performance.
    • Connectivity Issues: Ensure a stable internet connection when playing online. Check server settings and network configurations if experiencing issues.
  2. Support

    • Guides and Forums: Refer to online guides, forums, and community resources for additional tips and troubleshooting advice.
    • Official Support: Contact Mojang or Microsoft support for issues with your account, game installation, or other technical problems.

7. Post-Game Activities

  1. Review and Reflect

    • Analyze Builds: Review your builds and projects. Reflect on what worked well and areas for improvement.
    • Set New Goals: Set new objectives for exploration, building, or survival challenges. Try new mods or updates to enhance your gameplay experience.
  2. Explore Additional Content

    • Updates and Expansions: Stay updated with new game updates, expansions, and community content. Explore new features and additions to the game.
January 04, 2013   Posted by SET INNOVATIVE
Read More


Getting Started

1. Installation and Setup

  • Download Heavy Rain from your preferred platform (PlayStation, PC, etc.).
  • Install the game and launch it, adjusting settings for graphics, audio, and controls.

2. Controls

  • Familiarize yourself with the controls for movement, interactions, and quick-time events (QTEs).
  • Practice using the analog stick and buttons to navigate different scenarios.

Gameplay Overview

1. Main Characters

  • Ethan Mars: A father searching for his kidnapped son.
  • Madison Paige: A journalist investigating the Origami Killer.
  • Norman Jayden: An FBI profiler using advanced technology.
  • Scott Shelby: A private detective looking into the murders.

2. Structure

  • The game is divided into chapters, each focusing on different characters and their perspectives.
  • Choices impact character relationships and the story's outcome.

Walkthrough by Chapter

Chapter 1: The Wounded Man

  • Control Ethan as he wakes up in his home. Explore the environment.
  • Follow the prompts to interact with objects and trigger events.

Chapter 2: The Interrogation

  • Play as Scott Shelby, investigating a crime scene.
  • Engage in dialogue and examine clues to piece together the investigation.

Chapter 3: The Documents

  • Switch to Norman Jayden. Use your ARI (Augmented Reality Interface) to analyze evidence.
  • Make decisions that can affect the investigation.

Chapter 4: The Escape

  • Control Madison as she tries to escape from a dangerous situation.
  • Quick-time events are crucial here; focus on timing and accuracy.

Chapter 5: The Origami Killer

  • As Ethan, make choices that impact your son’s fate.
  • Collect origami figures to progress in the story.

Chapter 6: The Bridge

  • This chapter features significant choices. Decide how to approach situations involving tension and sacrifice.

Chapter 7: The Box

  • Control Norman and further investigate the Origami Killer.
  • Your choices will affect your relationships with other characters.

Chapter 8: The End of the Line

  • As Madison, make key decisions about your relationships and motivations.
  • Prepare for emotional confrontations.

Chapter 9: The Last Chance

  • Play as Ethan again and face challenging scenarios.
  • The choices made in previous chapters culminate here, affecting the outcome.

Chapter 10: The Origami Killer

  • This is the climax of the game. Make your final decisions carefully.
  • Your choices throughout the game will lead to one of several endings.

Tips and Strategies

1. Pay Attention to Choices

  • Every choice impacts character relationships and the story. Think carefully before acting.
  • Replay chapters to explore different decisions and outcomes.

2. Explore Thoroughly

  • Take your time to explore environments for clues and hidden elements.
  • Interaction with objects can lead to deeper character insights.

3. Practice QTEs

  • Quick-time events are crucial for survival. Practice timing to improve your success rate.

Troubleshooting

Common Issues

  • Game Performance: Ensure your system meets the requirements; lower settings if needed.
  • Control Problems: Adjust sensitivity and key bindings in the options menu.

Conclusion

With this walkthrough, you are now prepared to delve into the gripping narrative of Heavy Rain. Enjoy the intricate storylines and emotional depth as you guide your characters through this thrilling experience!

February 23, 2010   Posted by SET INNOVATIVE
Read More


 Air traffic management (ATM) is a complex and technical field that involves coordinating the safe and efficient movement of aircraft in the skies and on the ground. Whether you’re an air traffic controller, a pilot interacting with air traffic control (ATC), or a developer working on an air traffic simulation game or software, understanding the core mechanics and procedures is essential.

This walkthrough covers the core aspects of real-world air traffic management, detailing operational stages, communication protocols, and technical systems.

1. Key Components of Air Traffic Management

Air Traffic Control (ATC)

ATC ensures the safe movement of aircraft by providing instructions and clearances. ATC operations are divided into:

  1. Tower Control: Manages aircraft on the ground and in the immediate airspace around an airport (takeoffs, landings).
  2. Approach/Departure Control: Guides aircraft as they approach or depart an airport, typically within 50 nautical miles.
  3. Enroute (Area) Control: Oversees aircraft during the cruise phase of flight over long distances.

Communication Systems

Effective communication is critical for ATM. Controllers and pilots use:

  • VHF/UHF Radio: For short-range communications.
  • CPDLC (Controller Pilot Data Link Communications): Digital messaging for enroute operations.
  • Transponders: Provide altitude, position, and flight identification data.

Surveillance and Navigation Tools

  1. Radar Systems: Monitor aircraft positions and movements.
  2. ADS-B (Automatic Dependent Surveillance-Broadcast): Aircraft broadcast real-time position data to ATC and other aircraft.
  3. Navigational Aids (NAVAIDs): Includes VOR (VHF Omni-directional Range) and ILS (Instrument Landing System).

2. Phases of Air Traffic Management

Phase 1: Preflight

Before a flight begins, pilots and dispatchers coordinate with ATM systems for:

  1. Flight Planning:
    • Route selection, considering weather, airspace restrictions, and efficiency.
    • Filing the flight plan with ATC authorities.
  2. Clearance Delivery:
    • ATC issues a clearance that includes the route, altitude, and departure procedures.

Example Communication:

  • Pilot: “Clearance delivery, Flight 123 requesting IFR clearance to JFK.”
  • ATC: “Flight 123 cleared to JFK as filed, climb and maintain 10,000 feet, departure frequency 124.7, squawk 5432.”

Phase 2: Ground Operations

Aircraft movements on the ground include taxiing to/from runways and gates.

  • Clearances: Controllers guide pilots to ensure no conflicts on taxiways.
  • Pushback: Pilots communicate with ground control before pushback and engine start.

Key Terms:

  • Hold Short: Instruction to stop before crossing a runway or designated point.
  • Runway Incursion: Unauthorized presence of an aircraft, vehicle, or person on a runway.

Phase 3: Takeoff and Departure

Tower controllers manage takeoff operations.

  1. Line-Up and Wait: Aircraft position on the runway, awaiting takeoff clearance.
  2. Takeoff Clearance: Issued once the runway is clear.

Example Communication:

  • Tower: “Flight 123, cleared for takeoff, runway 27. Wind 270 at 10 knots.”
  • Pilot: “Cleared for takeoff, runway 27, Flight 123.”

Once airborne:

  • The departure controller takes over, providing heading and altitude adjustments for smooth integration into enroute traffic.

Phase 4: Enroute

Enroute controllers manage aircraft during cruise, ensuring safe separation and efficient routing.

  1. Vertical Separation: Minimum of 1,000 feet between aircraft at different altitudes.
  2. Lateral Separation: Horizontal distance maintained based on radar coverage and navigational accuracy.
  3. Conflict Resolution: Controllers resolve potential collisions by issuing vectors (course changes) or altitude adjustments.

Example Communication:

  • ATC: “Flight 123, climb and maintain FL350.”
  • Pilot: “Climbing to flight level 350, Flight 123.”

Phase 5: Descent and Approach

Approach control guides aircraft into the terminal airspace, coordinating with tower control for landing.

  1. STAR (Standard Terminal Arrival Route): Predefined paths for approaching an airport.
  2. Instrument Approach Procedures: Include ILS, RNAV, or visual approaches.

Example Communication:

  • ATC: “Flight 123, cleared for ILS approach, runway 09. Contact tower at 118.5.”
  • Pilot: “Cleared ILS runway 09, switching to 118.5, Flight 123.”

Phase 6: Landing and Ground Handling

Tower control manages landing clearances.

  • After landing, pilots switch to ground control for taxi instructions back to the gate.

Example Communication:

  • Pilot: “Ground, Flight 123, clear of runway 09, requesting taxi to gate.”
  • Ground: “Taxi to gate B12 via taxiway Alpha, Bravo.”

3. ATC Operations and Tools

Flight Progress Strips

ATC uses physical or electronic strips to track aircraft details such as:

  • Call sign.
  • Assigned altitude.
  • Route information.

Separation Standards

To ensure safety:

  1. Vertical Separation: Minimum of 1,000 feet.
  2. Horizontal Separation:
    • 3-5 nautical miles near airports.
    • 5-10 nautical miles for enroute traffic.

Weather Considerations

  • METAR and TAF Reports: Provide real-time and forecast weather data.
  • Weather Avoidance: Controllers reroute traffic around storms.

4. Emergencies and Unusual Situations

Emergency Protocols

  1. Distress Call: Pilots declare emergencies using "MAYDAY" or "PAN-PAN."
  2. Priority Handling: ATC clears airspace and provides vectors to the nearest suitable airport.

Example Communication:

  • Pilot: “Mayday, Mayday, Mayday, Flight 123, engine failure, requesting immediate landing.”
  • ATC: “Flight 123, cleared direct to runway 09, all other traffic cleared.”

Loss of Communication

  • Pilots follow published lost comms procedures, maintaining last assigned altitude and heading until safely landed.

5. Simulation or Training Scenario Walkthrough

If this walkthrough is for an air traffic simulation game or training software:

  1. Scenario 1: Manage departing traffic during peak hours.
    • Assign clearances and avoid runway incursions.
  2. Scenario 2: Handle an emergency (e.g., an aircraft with hydraulic failure).
    • Prioritize the emergency aircraft and reroute other traffic.

Tips for Success:

  • Maintain clear situational awareness.
  • Use radar tools to predict conflicts.
  • Prioritize communication clarity and brevity.

6. Tips for Real-Time Management

  1. Prioritize Safety: Always ensure safe separation.
  2. Stay Calm Under Pressure: Handle peak traffic and emergencies with composure.
  3. Leverage Technology: Use tools like radar, ADS-B, and weather systems effectively.
  4. Continuous Learning: Study updates in airspace regulations and ATM technology.

By mastering these procedures and principles, you’ll have a comprehensive understanding of air traffic management, whether applied to real-world operations, training, or simulation environments


November 15, 2009   Posted by SET INNOVATIVE
Read More


Introduction

Genshin Impact is an open-world action RPG developed by miHoYo. Set in the fantasy land of Teyvat, players explore various regions, complete quests, and uncover the mysteries of the world while collecting characters and leveling up.

Getting Started

1. Choosing Your Traveler

  • At the beginning of the game, you can select either the male (Aether) or female (Lumine) Traveler.
  • The choice affects the story slightly but does not change gameplay significantly.

2. Understanding the Basics

  • Controls: Familiarize yourself with movement, combat, and interaction controls.
  • Character Switching: You can switch between characters in your party during gameplay. Use this to take advantage of elemental combinations.

Exploring Teyvat

1. Map and Regions

  • Mondstadt: The City of Freedom, influenced by Western culture.
  • Liyue: A region inspired by Chinese culture, known for its business and trade.
  • Inazuma: An archipelago with a strong emphasis on Shinto culture and politics.
  • Sumeru: A region focused on wisdom and knowledge.

2. Navigating the World

  • Use the map to locate quests, resources, and landmarks.
  • Waypoints: Activate waypoints to fast travel and explore the world more efficiently.

3. Collecting Resources

  • Gather materials for crafting, cooking, and character ascension.
  • Look for resources like ores, plants, and cooking ingredients scattered throughout the world.

November 12, 2003   Posted by SET INNOVATIVE
Read More


Getting Started

1. Installation and Setup

  • Install Black & White from your preferred platform.
  • Launch the game and adjust settings for graphics and controls.

2. Tutorial

  • Begin with the tutorial to learn the basic mechanics, including using your hand to interact with the world and your creature.
  • Familiarize yourself with the user interface, including the health and belief meters.

Gameplay Overview

1. Main Objectives

  • Build and manage your village.
  • Gain the belief of your followers.
  • Train your creature to perform tasks and influence your followers.

2. User Interface

  • Hand Cursor: Use it to manipulate the environment and interact with followers.
  • Creature Menu: Manage your creature’s skills and behaviors.
  • Map: Navigate between different areas and view your influence.

Tips and Strategies

1. Managing Your Followers

  • Encourage positive actions by rewarding good behavior (e.g., food, praise).
  • Discourage negative actions by punishing bad behavior (e.g., throwing them or scaring them).
  • Balance your followers' needs for faith, food, and safety.

2. Creature Management

  • Train your creature by demonstrating tasks (e.g., planting trees, collecting resources).
  • Teach your creature tricks that can impress followers or scare enemies.
  • Keep your creature healthy by feeding and caring for it.

Advanced Techniques

1. Utilizing Miracles

  • Unlock and use miracles to assist your followers (e.g., healing, creating resources).
  • Be strategic with miracles; overusing them can lead to dependency.

2. Expanding Your Influence

  • Explore new areas to gather resources and followers.
  • Complete quests to gain additional powers and unlock new abilities.

Troubleshooting

Common Issues

  • Game Crashes: Ensure your system meets the minimum requirements and check for patches.
  • Control Issues: Reconfigure controls in the options menu if needed.

Conclusion

With this walkthrough, you’re now equipped to become a powerful god in Black & White. Remember, your choices shape the world and your creature, so approach each decision thoughtfully. Enjoy your journey of divinity!

March 15, 2001   Posted by SET INNOVATIVE
Read More

Bookmark Us

Delicious Digg Facebook Favorites More Stumbleupon Twitter

Search